Table of Contents
How do I create a heart from individual photos on my wall?
Dear GAEKKO team,
I have captured countless beautiful memories on photos and would love to put them on the wall as a creative photo wall. My photos are of very special moments in our life together: Our countless trips, our wedding, pictures of family celebrations and baby pictures of our little daughter. Before I start designing my own photo wall, I wonder if I should frame my photos in advance with a passe-partout or if there is a way to hang the photos on the wall without a frame?
Now there are really many different ways to hang them and I can’t decide which arrangement to choose. Since these are very emotional moments in my life, I have heard about the creative possibility of arranging my pictures in a heart shape on the wall. I want to arrange my almost 100 photos so that they all form a big heart and then attach it to my wall. However, I don’t know how to do this. Do you have any good tips & tricks on how I can design a heart photo wall and what I need for it? How many photos do I need to reconstruct the shape of a heart?
Many thanks & best regards
Sandra
Our hangers for your individual photo wall
Our hangers for your DIY photo wall
An individual photo wall in the shape of a heart as a personalised decoration for your wall
Are you looking for a creative idea to decorate your wall with photos and pictures? The photo wall offers the perfect basis for arranging your favourite pictures of family or friends together. A photo wall usually consists of several photos that are combined and hung on the wall to create a coherent overall picture. The format and size of the photos play a rather subordinate role. There are also no limits to the design and arrangement of your photo wall.
There are many different ways to arrange your favourite photos on the wall. A particularly effective hanging is a picture wall in the shape of a heart. There are a few tips and tricks you should follow to create a harmonious heart-shaped picture wall: We show you how to create a heart from photos in our article.
Today we will show you how to hang your photos on the wall in the shape of a heart. With our hangers you can create a heart photo wall quickly and easily and decorate the wall with your favourite photos.
Which images go together and what is the perfect place for a photo heart?

A self-designed photo wall in the shape of a heart should always correspond to your personal taste. In principle, you can combine all the photos that are close to your heart. Of course, you can also choose a fixed theme for your collage. Whether snapshots of family celebrations or holiday memories: To give your wall a very personal touch, the overall effect is important in addition to the combination of the different photos. It doesn’t matter whether the photos are behind a picture frame or hung on the wall without a frame. You can also experiment with the size of the photos as you wish. Of course, you also have the option of supplementing your photos with posters or art prints.
You can create photo walls wherever there is enough space on your wall. Your living room wall, the wall in the hallway or staircase are particularly suitable, as you enter these areas several times a day and can therefore admire the beautiful memories several times a day. If you have chosen more private photos for your photo wall, you can also decorate the walls in your bedroom or teenager’s room
Heart photo wall design: DIY wall design for your home

Before we start with the instructions for the perfect photo heart, you should ask yourself a few questions in advance: Will the photos be placed in a picture frame first or should the pictures be placed on the wall without a frame? Do you want to attach the pictures directly to the wall or do you use a backing? You can use a larger wall grid or a cork board as a base, for example. You can align your photos with small clips on the heart-shaped grid. You can also attach your photos to the cork board with drawing board pins. The advantage of using a wall grid and cork board is that you can align your photos quickly and easily. In addition, you don’t have to attach the photo directly to the wall, you only have to mount the wall grid initially on the wall.
You have to find out for yourself what proportions your heart should have and where you want to place it in your home. However, you should have at least 16 individual photos to be able to flexibly adapt your heart to the size of your wall. You will need more small photos than larger ones. The heart will look most symmetrical if you use the same photo sizes. In our example, we only use rectangular photos or Polaroid photos. Of course, you can also create the heart from different photo sizes.
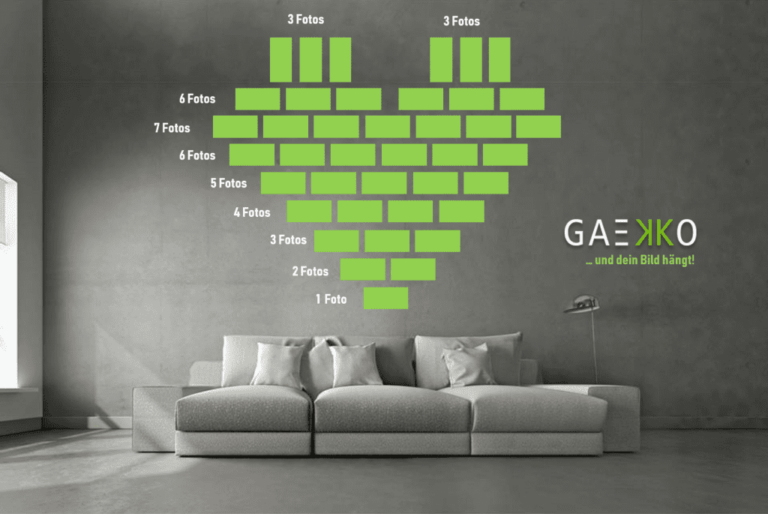
To give your photos some symmetry and create the perfect heart shape, you can use the template above. Our template consists of 40 photos with the top six photos portrait and the others landscape. If you want to be very precise, you can start by drawing the heart shape on a disproportionately large piece of cardboard. This way you can design the collage directly on the wall and ensure that the photos are arranged exactly in the shape of a heart. Use a ruler or tape measure to make sure that the photos are all the same distance apart.
Are you still unsure whether your photos will form a real heart? You can also try out the collage on the floor or a table beforehand. That way, your photo heart will definitely succeed.
The advantages of our picture hangers
Attach photos in the shape of a heart to the wall
Now you can start to arrange your photos and arrange them in a heart shape. You should take enough time until you are happy with the shape. It is easiest to start with the centre of the heart. Then you should work your way to the edges. Make sure that the first two rows are straight and parallel to each other. Otherwise your heart can quickly become crooked. A spirit level and small pencil marks can help.
Once you have stuck the first photos on the wall, you will quickly get a feel for the actual size of your photo heart and see whether you have enough photos available. For a nice overall effect, you should pay attention to the colouring of the individual photos and make sure that the photos fit together well. After attaching the first photos, you can check the symmetry of the photo heart with a little distance. Finally, you can admire your individual DIY decoration wall.
How do I attach the photos to the wall quickly and easily?
Of course, you can attach your favourite pictures to the wall with a drawing board pen or a small nail. However, a nail in the wall does not look nice and always leaves an unsightly hole. Therefore, you should stick photos and smaller pictures on the wall without nails. One way to attach your photo directly to the wall is with double-sided adhesive tape. You should place a small strip at least on each corner of the photo. Then press the photo and the adhesive tape to the wall.
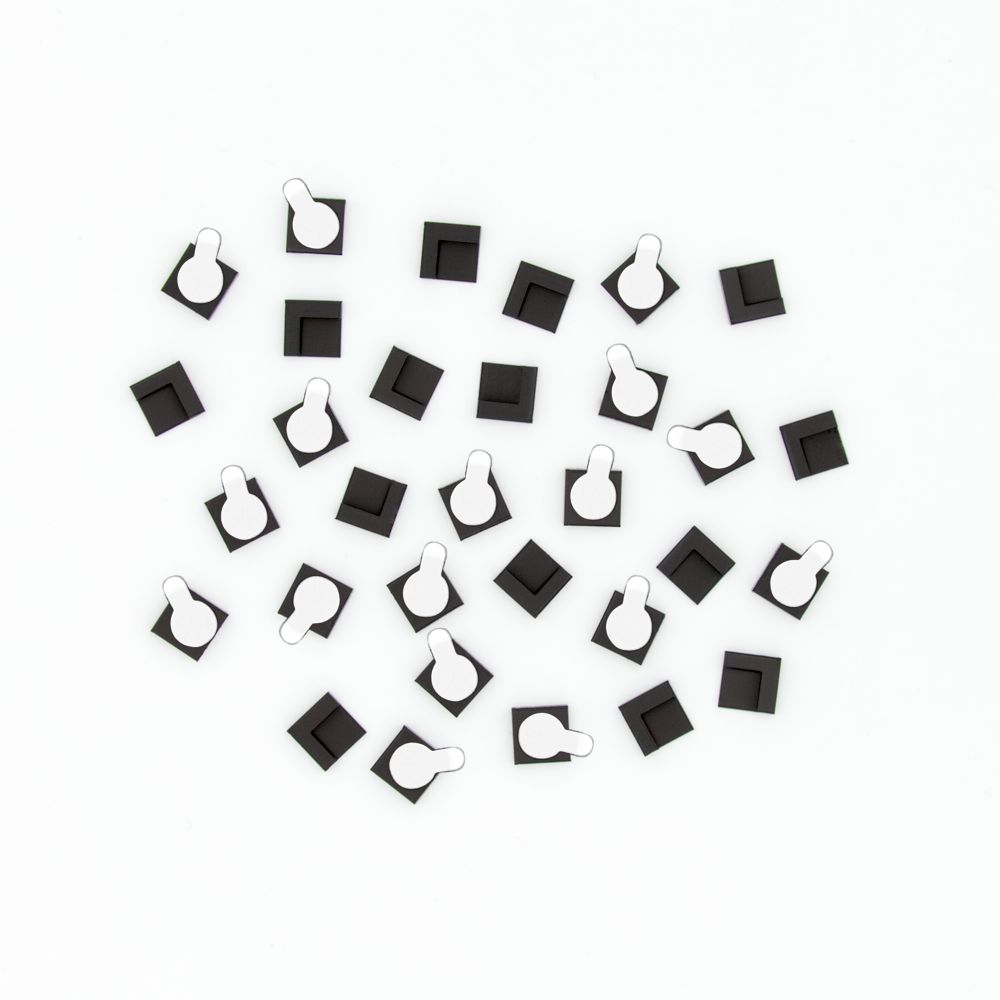
With our FotoGAEKKO you can stick your holiday photos or children’s photos on the wall in no time at all. The high-quality adhesive dots are easy to remove from the wall and leave no traces on your wallpaper compared to classic adhesive tape. This also allows you to change the arrangement of your photos at any time. A quick photo dip is also easily possible with our photo holder. This means you remain flexible at all times and don’t have to commit yourself. Our self-adhesive picture hangers are therefore perfect for individually decorating your wall with your favourite moments in the form of a heart-shaped picture wall.
Our picture hangers for your DIY Photo wall
GalleryGAEKKO
The adhesive picture hanger for aluminum prints, plexiglass & acrlic prints
-in stock for immediate delivery-
PictureframeGAEKKO
for any kind of framed pictures
-in stock for immediate delivery-
CanvasGAEKKO
stretcher frames and wooden frames
-in stock for immediate delivery-
PhotoGAEKKO
photos & postcards
-in stock for immediate delivery-
PosterGAEKKO
posters & art prints
-in stock for immediate delivery-


