Table of Contents
Picture hangers for sloping roofs
Tips and tricks for hanging pictures on sloping roofs
You want to hang a picture on a wall with a sloping roof and have always wondered how this works? You don’t necessarily have to do without wooden picture frames or stretcher frames on a sloping roof just because the wall is sloping. You don’t even have to be a great craftsman to secure a picture to a sloping roof. All you need is a little skill and the right accessories to hang your picture securely on a sloping roof. We show you various solutions for mounting pictures on sloping roofs and attics and give you tips and tricks for optimal living space design.
Today, there are special picture hangers that make it easier to hang wall pictures on sloping roofs. These are for all those who also live in the attic and do not want to do without pictures in rooms with sloping roofs or walls.
Picture hangers for sloping ceilings
In order to be able to safely attach photos, pictures with picture frames or pictures on boards to a sloping roof, you do not need any other accessories apart from a simple picture hanger set for sloping roofs. This means that you do not have to drill complicated holes through your picture, nor do you need magnets or additional hooks to fix your picture in the roof space. These special picture hangers use the idea of a simple anti-theft device for pictures.
Basically, this protection works like a simple lock. This can be found in many museums, galleries or hotels, for example, where the framed paintings should not be removed from the wall. A small pressure from below against the picture frame is usually enough and it falls off the wall. Since this foreseeable risk of accident is too high, many parents also use these anti-theft devices as child safety devices.
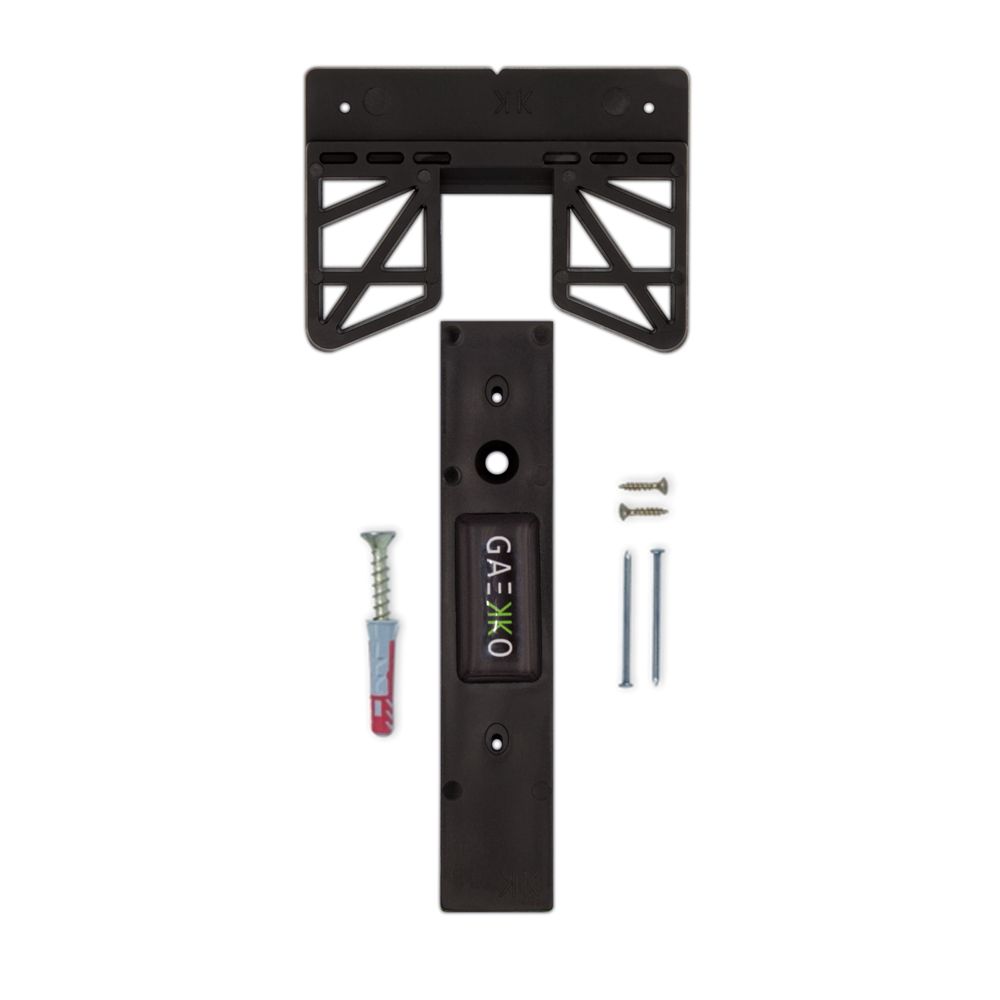
The secret of these anti-theft devices lies in the special hammerhead screw, which can only be attached and removed again with a special key. This fixing key, with which the fitting can be opened and closed, is of course included in the scope of delivery of the picture hanger sets. On the upper side, the frame is supported by two hinges or hooks, while on the lower edge of the frame, the hammerhead screw in combination with an additional fitting ensures a secure hold. The pin or fitting screwed onto the lower frame is inserted into the rail or the hammerhead screw.

Hanging pictures on a sloping roof - this is how it works
With the help of a special picture hanger set, canvas pictures on stretcher frames or picture frames can be quickly and easily attached to a sloping roof or wall. To do this, attach the supplied prong hangers or hooks and the special fitting to the frame of your picture. Of course, it helps if you have a picture with a wooden frame, as it is easier to hang the prong hangers on the wall. It is also easier to screw the fitting to a wooden frame.
An Ikea frame, for example, is not necessarily made of conventional wood. In this case, it is advisable not to place the screws for the fitting too close to the edge of the frame and to pre-drill the holes with a small drill. With wooden stretcher frames, the fitting can be mounted flush with the lower edge of your frame. Transfer the distance of the two already mounted prong hangers to your wall and then drill the corresponding holes in the sloping roof. Insert the dowels into the drilled holes and then fix the picture hangers to the wall with the help of the screws. Use a spirit level to check that the picture hangers are level on the wall so that your picture will hang straight later.
Our hanging system for sloping roofs
You can then hang your picture on the sloping roof to sketch a small mark on your wall at the height of the special fitting. Take the picture off the wall again and drill a hole at the marked spot. Insert a dowel and screw in the T-screw or hammerhead screw. Now your picture frame can be put back on the wall of the sloping roof. The T-screw and the special fitting should now be at the same height. Finally, turn the T-screw into a vertical position with the help of the special key in order to be able to hook in the securing device with the help of the fitting. Your picture now hangs securely on the sloping roof and can no longer be removed from the wall.
Attaching a gallery rail to a sloping roof
Picture frames can also be hung on a sloping roof or wall with a gallery rail. Even if the gallery rail runs at an angle along the wall, this does not necessarily mean that the holders will all fall down. Special stoppers make it possible to hold hooks and ropes, and thus also your picture frame, bomb-proof on the sloping roof. Gallery rails can basically be attached to any wall, regardless of whether it is a normal wall or a cavity wall. Attaching the gallery rail along the edge of the sloping roof is quite simple and is similar to mounting it on a conventional straight wall. As a rule, gallery rails must be fixed to the wall with nails or screws. After attaching the gallery rail, pictures can be replaced quickly and easily.
Gallery rails on sloping roofs have one disadvantage: The pictures are attached to hanging ropes with hooks. The ropes or wires hang vertically and not along the slope of the roof. This results in the picture hanging in the middle of the room. To avoid this, the picture must be attached to the roof slope at the lower end with a hook. However, this means renewed effort and causes holes in the wall.
Sticking pictures to a sloping roof - without holes in the wall
For very light pictures, you can do without a special picture hanger for sloping roofs altogether. Here you have the option of attaching your picture directly to the wall with a high-quality adhesive tape. With a double-sided adhesive tape, for example, you can stick the bottom of your frame directly to the wall. Thanks to the adhesive on the front and back, the tape can be practically hidden and your picture is in the foreground. Keep in mind, however, that the adhesive must be pressed firmly both to your picture and to your wall in order for it to form a permanent bond.
Our tip: GAEKKO makes hanging pictures child’s play. No more complicated hanging ropes, gallery rails or adhesive sheets. The GAEKKO picture hanger makes it possible. With several attachment options, our picture hangers are suitable for all types of walls and pictures.
Hanging canvas pictures on sloping ceilings
CanvasGAEKKO
stretcher frames and wooden frames
-in stock for immediate delivery-
Hanging photos and postcards on sloping roofs
PhotoGAEKKO
The adhesive picture hanger for
photos & postcards (self-adhesive)
-in stock for immediate delivery-
Hanging aluminium dibond and acrylic glass pictures on sloping ceilings
GalleryGAEKKO
The adhesive picture hanger for aluminum prints, plexiglass & acrlic prints
-in stock for immediate delivery-
Hanging posters on sloping ceilings
PosterGAEKKO
The adhesive picture hanger for
posters & art prints (self-adhesive and magnetic)
-in stock for immediate delivery-
Hanging picture frames on sloping ceilings
PictureframeGAEKKO
The adjustable picture hanger
for any kind of framed pictures (adjustable horizontally and vertically)
-in stock for immediate delivery-


