Table of Contents
Our tips & ideas for designing your individual picture wall without a frame
You have many different possibilities to design your own photo wall! However, before you design your photo wall, you should first think about the following questions:
Should your picture wall reflect an overarching theme? Which arrangement of your pictures and photos do you prefer? How much space do you have available for your photo wall? Do your pictures have different motifs or colours and do they match at all? What do you have to consider when planning your own photo wall?
Today we would like to focus on all pictures without frames. For a stylish and individual picture wall, your pictures do not necessarily have to have a frame. In our guide, we show you numerous ideas on how to create your very own picture wall without a frame and also give you inspiration on how to hang your pictures on the wall quickly and easily. And the whole thing frameless!
Discover our self-adhesive hanging hooks for your individual picture wall

Successfully design your own photo wall: The right preparation
You are not sure how to skilfully stage your numerous pictures and photos? Maybe you want to hang up your picture wall without a frame or even without drilling or nails?
Perhaps you have already decided on an arrangement, but then realise that the hanging does not suit your flat and your wall at all? Before you start planning your individual picture wall, you should have clarified the following points for yourself in advance:
Our picture hanger for your own photo wall
Designing a picture wall with the selection of the right wall area
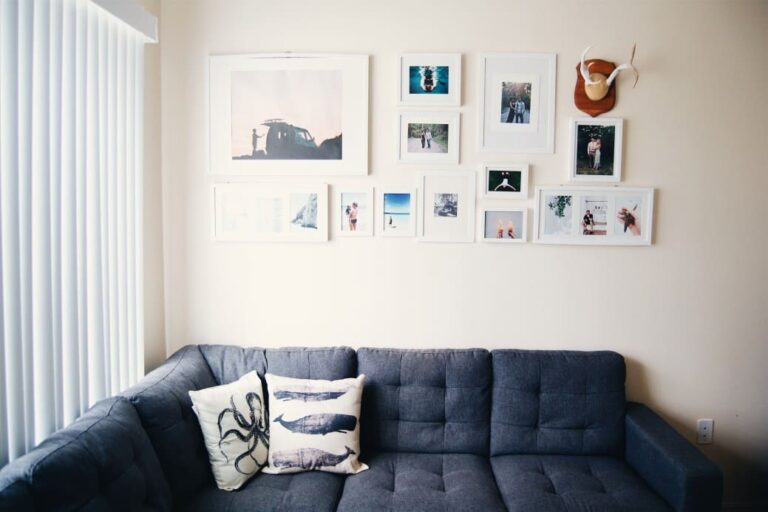
First you should decide in which room and on which wall you want to place your picture wall. Is it a wall above the sofa, a wall space in the hallway above a sideboard, a free space on a staircase, a recess in the sloping roof or a free space in the study?
You should include your entire flat or at least an entire wall view in your planning for your own picture wall. This is because the existing furnishings provide important clues for creative ideas when designing the wall. For example, your picture wall can be based on the outer edges of your sofa or sideboard. The door height or the window sills can form the upper edges of your photo wall. This makes the picture wall look much calmer and more harmonious.
Finding the right height for optimal wall decoration
Depending on which hanging or arrangement you choose, you should make sure that the centre of the central image is at the eye level of the viewer. According to the rule of thumb of many museums, you can hang the centre of the image at a height of about 1.50 m from the floor. If the view of your photo wall is more likely to be from a seated position, you should take this into account when determining the height. You can find a precise description of the ideal picture height, also depending on your picture and the external conditions, in our guide “Hanging pictures – ideal picture height”.
Our adhesive picture hangers for every wall
Advantages at a glance:
Self-adhesive
Without wholes in the wall
No frames or tools are necessary
Removable without residue
Photo wall ideas: Create a photo collage without a frame?
You need to think in advance about which pictures are available to you and which motifs you want to integrate into your picture wall? Maybe you even want to hang your picture wall without frames? You can also cleverly combine different pictures without frames, such as photos, posters or pictures on panels.
If you are planning your picture wall without a picture frame, there are several methods you can use. When hanging the pictures, you should match them in size, shape and colour. For example, next to one large picture you can hang two smaller ones that end with the upper and lower edge of the large picture. By spacing the different pictures evenly without frames, you create a visual calm and order.
To create a picture wall with a system, it is particularly important that you start with a central picture as the basis for the hanging. Therefore, you can hang an even arrangement of different formats, motifs and pictures.
Our tip: In addition to a classic arrangement on the wall, you can also present your motifs and photos on gallery rails or picture rails. The picture rail is mounted once on the wall and can then be re-equipped again and again. However, you should frame your frameless pictures beforehand, as the pictures usually stand on the picture rail and lean loosely against the wall.
Designing a picture wall without a frame - The right arrangement of your pictures

The picture hanger for aluminium composite, acryl glass, forex & cardboard
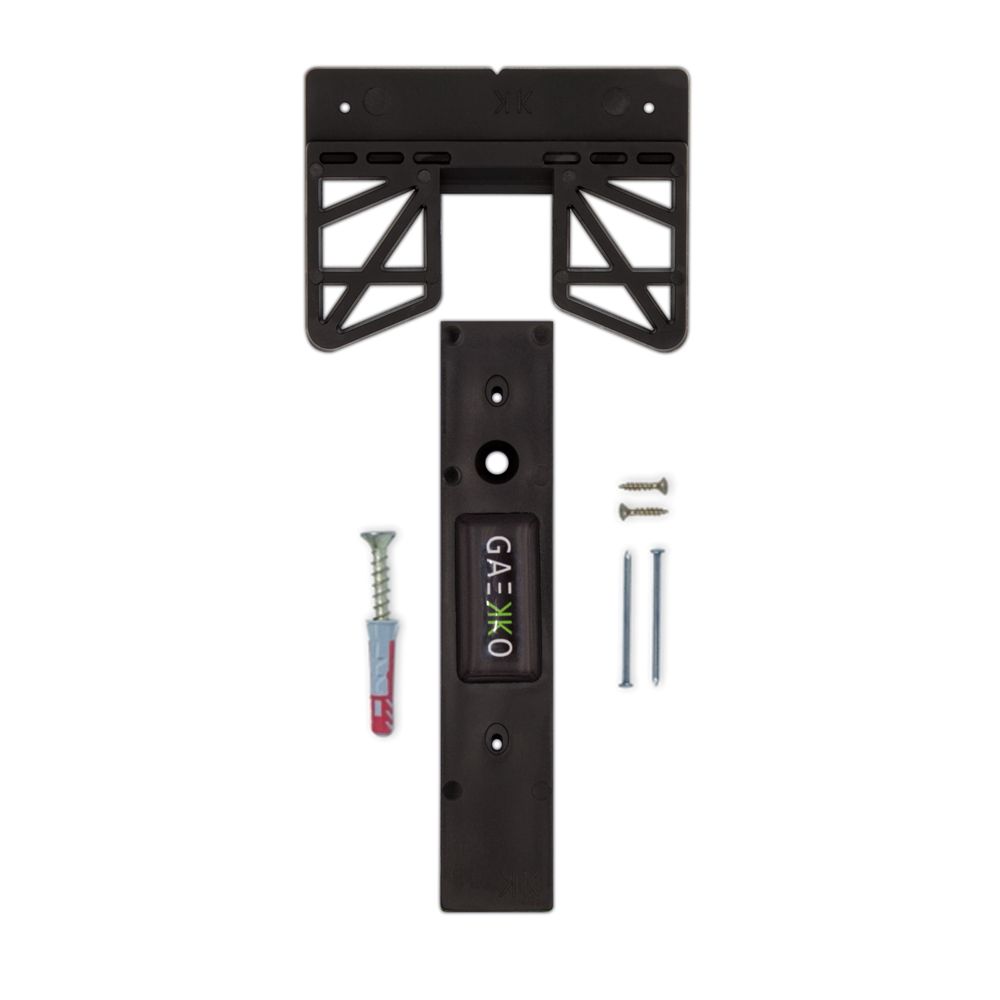
GalleryGAEKKO
With the innovative 3-in-1 hanging system by GAEKKO, you can hang up any kind of frameless picture on any wall as easy as winking. It is your choice: Gluing, nailing or screwing.
- All image formats and wall surfaces
- Levitating gallery look
- If glued, it can secure up to two kilos and if it is screwed or nailed, it can secure up to four kilos
Designing a picture wall without a frame - The right arrangement of your pictures
How many pictures do you want to hang on your picture wall? For some arrangements, the number of pictures to be hung is decisive. With two or three motifs, you cannot really speak of a real picture wall, as the arrangement options are rather limited. Hanging the pictures in a row is very practical for the design of the wall when there are only a few motifs. For the eye, an odd number of pictures in a row looks more harmonious than an even number. Arranging a picture wall in a mosaic, on the other hand, requires an even number of motifs, so the arrangement always looks tidier than with an odd number of pictures.
How do you arrange your pictures on the wall so that they look great and achieve the best possible effect? In order for your photo wall to look harmonious and for the mounting of your motifs to be reasonably practical, you should first and foremost think about the right arrangement. There are also rules for the different arrangements and hangings that make it easier for you to hang your pictures. We will briefly introduce you to the different hanging arrangements for your living room and give you tips and ideas for the optimal wall design.
The classic style - arranging images in a line or row

You are structured and like clear lines? Then the row hanging is just right for you. Here you can decorate your picture wall both horizontally and vertically in one line. You can also arrange your favourite photos in a strict grid. You should pay particular attention to the fact that the spacing between your artworks is always the same. As a rule, a gap of 5 centimetres is sufficient to make your art a balanced and harmonious eye-catcher.
Our tip: If you have a very narrow wall, for example, you can arrange the pictures one above the other. However, if you want to make a narrow wall look wider, you should arrange the motifs next to each other. An additional picture frame supports the more massive effect, so that the arrangement in the flat comes into its own. The reverse effect of wall design also works with this type of hanging, of course: To make a wide wall look narrower, simply arrange the pictures one below the other.
Arrange images with the edge hanging
For the edge hanging, you proceed similarly to the row arrangement. However, a second row is added to your photo wall. The idea behind this is that the dividing line between the two rows is the edge around which everything on your photo wall revolves. The simplest form of edge hanging is the parallel arrangement of your motifs, as shown in the following example:
Our tip: The wider the edge, the more this arrangement and the overall ensemble of your motifs will come into its own.
Edge suspension with staggered arrangement
If the parallel arrangement is already to your taste, but you want to add a little creative kick to the arrangement, then simply offset a row of pictures in the wall design, for example. This will give your photo wall a slightly looser style. The following arrangement serves as inspiration and you are welcome to use this idea as a template for your own photo wall with your favourite photos:
The funnel-shaped edge suspension
With the funnel-shaped edge hanging, all those who like symmetry in the arrangement but at the same time want to hang motifs of different sizes will get their money’s worth. The funnel is created by arranging large motifs, with or without a frame, above the edge and small motifs on the underside of the edge. This makes the arrangement look like a funnel that is open at the top:
Our tip: The reverse arrangement of your photo wall is also possible – simply place the top row with small pictures and large motifs at the bottom – and you have created an edge hanging with an inverted funnel.
The mirror-inverted edge suspension
A special type of wall design is the mirror-inverted arrangement of the edge hanging. In the first step, you can arrange motifs or frames of different sizes on the top row. Once this is done, the bottom row is mirrored. This means that each picture size can also be found on the lower row in the same arrangement.
Our tip: For creative designers, for example, a second mirroring can be done across the x-axis, i.e. in a horizontal direction, which in turn looks more balanced than a single mirrored edge hanging. You can find an idea of how to arrange your motifs in a double mirrored edge hanging as a photo wall in our template:
Design the picture wall in a square
If you want to arrange several pictures next to each other and on top of each other on the wall, you can try your hand at a picture wall in matrix arrangement. The idea behind this is that pictures with the same number are arranged horizontally and vertically on the wall. For example, if you have 4 motifs, you can create a picture wall in 2×2 format. Of course, this type of hanging also works with a large number of pictures for a square in 3×3 or 4×4 format:
Mixed form of matrix and edge suspension
You can easily combine different arrangement styles with each other. There are no limits to creative ideas here. For example, the edge hanging can be combined very well with the matrix arrangement. The starting point is the arrangement in a square, which is extended to the side by further motifs. You can find an example of this type of wall design here:
Our tip: Arranging a row of pictures as opposed to a picture wall in matrix form or in a mosaic is the much simpler way of hanging. Because you only have to hang the pictures along one edge of the motifs or frames, arranging them in rows is less time-consuming than aligning the picture wall perfectly horizontally and vertically at the same time. The use of a spirit level and many marks on the wall with a pencil as well as frequent readjustments often have to be planned in when designing a picture wall as a matrix.
Orderly chaos - Everything is permitted
You like it rather wild and adventurous? Do you have several different paintings that you want to combine into a collage in your bedroom? Then you can express your style with a loose grid or salon hanging.
Petersburg Hanging
The Petersburg hanging can also meet your desire for chaos. At first glance, it looks slightly chaotic, because the picture wall is attached to the wall in different frame sizes, some with and some without a passe-partout. But if you look closely, you will always see a direct connection between the different types of pictures and frames.
Hanging multi-panel pictures
If you want to make a mural stand out, you can hang a multi-part picture as another type of picture wall. In a multi-part picture, a single motif is divided into several sections. Usually, multi-part pictures are printed on a canvas, because a canvas does not need a frame and thus the connection with the other parts of the picture comes into its own better. There are different types of multipart images. Probably the best known is the triptych. Here the motif is divided into three equal parts. With a small distance between them, these are hung next to each other in the desired place in the room.
Meanwhile, there are multi-part pictures in all shapes and colours. For example, there is a five-part picture that is very short at the ends and becomes larger towards the middle. This form is particularly suitable for setting off a centrally arranged picture very well.
The great advantage of multi-part pictures is the central effect in the room. By dividing the surface into several sections and arranging them on the wall at a small distance from each other, the effect of the picture is magnified. In this way, you can hang a motif on large walls without the individual motif looking lost. This form of hanging is particularly suitable for purists who want to arrange as few different picture walls as possible, but skilfully place them in the foreground.
If you want to know more about multi-panel pictures, check out our tips and tricks in our guide to hanging multi-panel pictures.
Design a picture wall with a picture rail
If you prefer a simple way of hanging pictures in rows or on edges, but don’t want to keep arranging them horizontally with a spirit level, you can use a picture rail. You can hang the picture rail on the wall with a few screws and place all your motifs with or without frames on it.
Our tip: In addition to pictures and photos, other decorative elements can be placed on the picture rail. This gives you even more creative design options than with an ordinary picture wall:
The great advantage of the picture rail is that the pictures always hang perfectly next to each other horizontally and thus appear very harmonious in the room for the viewer. In addition, this modified form of picture wall offers a great deal of flexibility, as not only the pictures but also the arrangement of the picture wall can be changed and exchanged quickly and easily at any time.
The most important motif comes in the middle
No matter which type of arrangement you choose – whether row hanging, Petersburg hanging edge hanging or an entire picture wall with horizontal and vertical pictures – the most important motif should always hang in the middle. The viewer always looks at the centre of a photo wall or picture wall so that it is seen as the most important picture in the overall arrangement of the picture wall. If you want to arrange a lot of pictures, your most important motif can quickly get lost. To counteract this, you can hang the central picture with a high-contrast frame or colour the picture differently to make it stand out from the crowd. If you do not want to emphasise any picture in particular and all motifs are equally important, then the picture wall should also have the same colour and frame so that the viewer perceives the whole as an ensemble on the wall.
If you are looking for more inspiration on hanging picture walls, our guide Hang your pictures – tips and tricks for your pictures will give you more ideas on how to design your picture wall.
Create a photo wall without a frame - arrangement tips for your best memories & favourite photos
Unlike a picture wall, a photo collage consists of many small photos that you can hang up in many different ways. We will show you some creative ways to create your own photo wall without frames and with little effort when hanging up your pictures.
Create a photo wall without a frame with a string

You can easily hang up your pictures with a rope or cord. Simply take a cord or a line and stretch it horizontally along your wall. Ideally, you should hang the cord at eye level. To align the string perfectly horizontally, use a spirit level. Mark both ends of the string on the wall with a pencil and check with the spirit level whether they are horizontal to each other. If the distance between the ends is greater than the spirit level, marking with a pencil along the wall will help to avoid subsequent corrections such as drilling or further holes on the wall.
Once the ideal height and orientation have been found, the rope is hung on the wall with a nail or dowel and screws. With clips, you can hang up many small photos quickly and easily. To hang up the photos and pictures, there are small clips or clamps made of wood, for example, which will make your photo wall look even more decorative:
Our tip: Create your photo wall with a metal wire and magnets. The metal wire looks better and comes in different shapes and sizes. Small magnets that discreetly hold the pictures on the wire are ideal for arranging them. For larger photos or Polaroid pictures, you should use small but strong neodymium magnets. This combination not only allows you to set more modern accents in terms of colour, but the photos also stand out even more thanks to the small, inconspicuous magnets on the metal wire.
The big advantage of a photo wall compared to a picture wall with a frame is the flexible exchange of the photos. Not only the position of the pictures but also the pictures themselves can be changed much more quickly and easily than framed and fixed picture walls. This variant is ideal for those who want to change their pictures on the wall more often and enjoy creative freedom.
Create a photo collage with a string of lights
One form of wall design that is particularly popular among young creative people is the arrangement of a photo wall with a string of lights. Your memories and family photos are attached to the chain with a clip, just like with a string. The cool side effect is that the motifs are illuminated, making the photo wall with your favourite photos shine even brighter.
Create a photo wall without a frame with a photo grid

If you want to change your pictures flexibly, but still have a real eye-catcher in your home, then the photo grid might be something for you. A photo grid is a grid made of metal that runs in a square grid in horizontal and vertical direction. The photo grid is attached to the wall with a nail or screw and dowel. Afterwards, you can easily hang your pictures on the metal grid with clips, staples or magnets, just like with a normal photo wall:
Our tip: A gold or rose gold photo grid looks very elegant on monochrome walls. Colourful photo grids can also provide a real colour contrast to your interior and create a modern style. In addition, the grids are particularly suitable for Polaroid photos. The nostalgic Polaroid on a modern metal grid looks very cheeky and will definitely attract attention.
The great advantage of photo grids is the variety of design options. The pictures can be attached both horizontally and vertically, which leaves a lot of freedom in the arrangement. Not only how you attach the pictures to the grid is very diverse, but you can also freely determine the design, spacing and height of the photos and pictures.
Picture frame with ropes
A still almost unknown, but nevertheless very creative way to skilfully stage your favourite photos is a picture frame with ropes. There are one or more ropes in the frame, which can be attached to the cord with a clip. The picture frame is attached to the wall as usual with a nail or screw.
Our tip: To be able to arrange many of your favourite photos on the wall, you should buy a picture frame with many ropes or hang several of these frames on the wall with one of the arrangement options mentioned above.
Create a photo wall without a frame with Washi-Tape
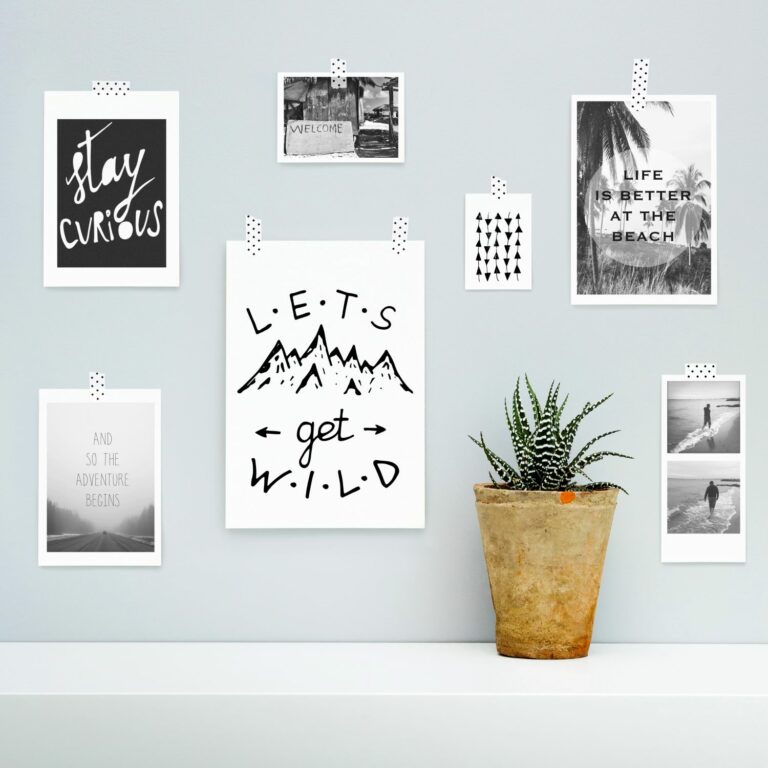
If you don’t want to limit yourself in terms of design and your photos are just sprouting out of the compartments, then you can hang up your photos with washi tape. Washi tape is a double-sided adhesive tape that can be bought in various patterns, shapes and colours in many shops for artists’ accessories or in DIY shops. You can arrange the washi tape criss-cross on the wall and use very different shapes and colours for creative wall design. When you have finished your pattern on the wall, simply stick the pictures to the washi tape and hang them on the wall:
Our tip: Use a different washi tape for each photo wall theme. This makes the arrangement of the pictures more coherent and the distinction between the picture contents becomes clearer to the viewer. A certain distance between different photo wall themes helps with orientation.
The great advantage of washi tape is that it can be extended almost infinitely. Unlike picture walls, you can quickly hang more pictures with washi tape and extend the photo wall horizontally or vertically. An arrangement across corners and several walls is also possible.
Create a photo collage with a photo curtain
To create your photo wall without a lot of work hanging or arranging the pictures, special photo curtains are particularly suitable. Photo curtains are equipped with transparent sleeves in which you can insert your pictures and photos and hang them on the wall.
Our tip: The photo curtain can be hung not only on the wall but also in other places in the home. For example, you can hang the photo curtain on the door. Especially small photo prints can easily be hung on the back of a door and create your own picture wall there. Placing larger pictures and picture frames on the door will be difficult, as they have a much higher weight and can quickly fall off the door when it is constantly opened and closed. Therefore, we recommend using a photo curtain for many, light pictures in slightly more difficult places.
If you would like more inspiration and tips for hanging pictures without frames, you can browse our Hanging pictures without frames section for more design options.
Designing a picture wall without a frame - The implementation
After you have clarified the points for yourself, we will show you with three tips and ideas how you can actually plan your picture wall without drilling through your wall with a complicated hanging or with holes that won’t fit later anyway.
If you have a talent for drawing, you can map out your picture wall in advance using a scale drawing of your room. You can draw the picture frames or canvases on a solid sheet of paper or cardboard and then cut them out. Now you can stick the cut-out mini picture frames onto the drawn area of your wall.
Instead of a thumbnail, you can also draw the outlines of your picture frames, posters or canvases on a larger cardboard. Now you can cut out the paper patterns in their original size and attach them to your wall with adhesive tape in the desired arrangement. This will also give you a feeling for the right arrangement and how your pictures will look in the room.
Of course, you can also lay out the original picture frames, posters or canvases on the floor and arrange and rearrange the arrangement on the floor until the desired result is achieved.
Designing a picture wall without a frame - Hanging it up
The planning is done, now only one step separates you from your picture wall. And this is by far the trickiest part: attaching your picture frames, posters or canvases to your wall. Maybe you don’t have a drill or the right drill at hand? Or maybe you’re just clumsy, have two left hands and can’t hammer a nail straight into the wall?
Maybe you’re moving again soon, don’t want any stress with the landlord and ask yourself why all the effort? Wouldn’t it be great if there was a solution to protect your walls and still hang your picture wall on the wall quickly and easily?
If you want to avoid unsightly side effects such as holes in the wall, drilling, or fallen plaster, we at GAEKKO have just the thing for you! Our self-adhesive hangers come without holes in your wall. It has never been so easy to hang your pictures on the wall and design your own individual photo wall without a frame.
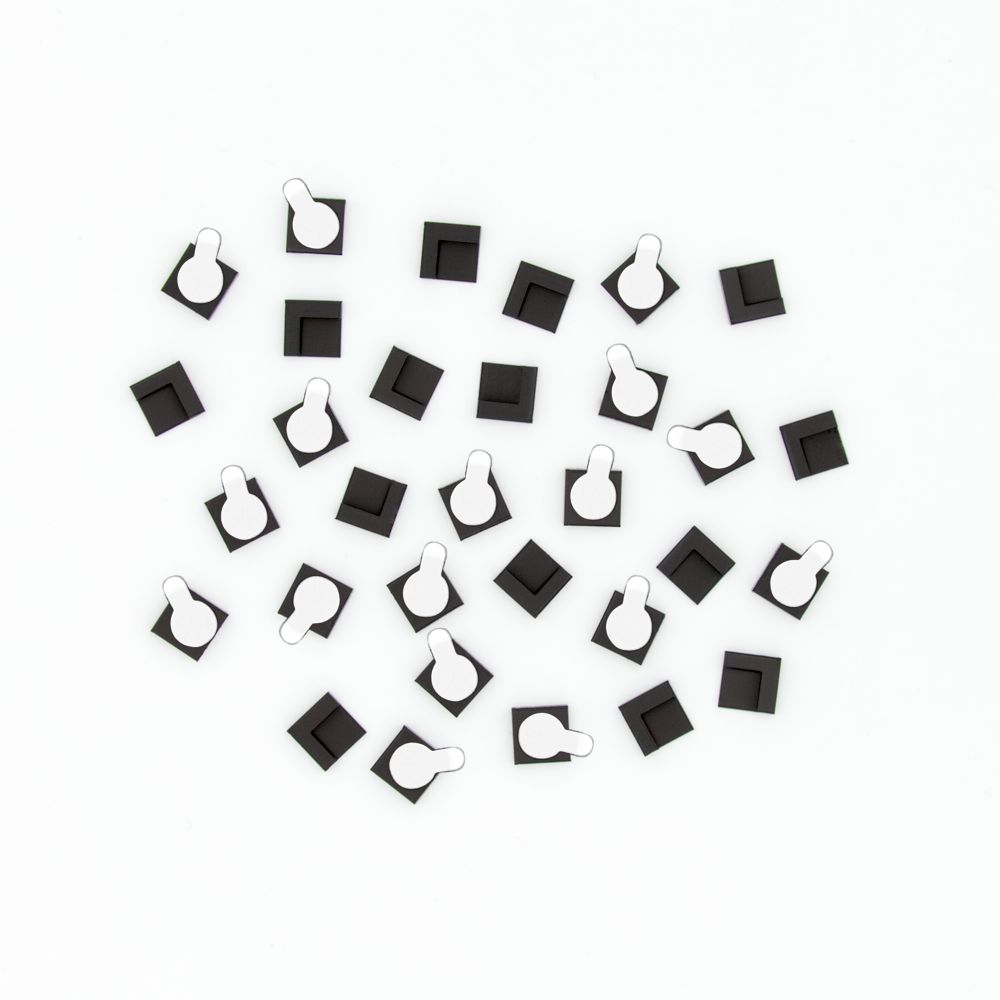
Use a spirit level to align our hangers straight on the wall. The module is attached to the back of your picture. You can thread the module into the hanger and your picture will hang securely and straight on the wall. You can find detailed instructions on how to attach your pictures to the wall here. We have the right hanger for every picture and every taste.
Discover our self adhsive picture hooks for all kind of pictures
GalleryGAEKKO
The adhesive picture hanger for aluminum prints, plexiglass & acrlic prints
4.7/5
-in stock for immediate delivery-
PictureframeGAEKKO
The adjustable picture hanger
for any kind of framed pictures
for any kind of framed pictures
4.5/5
-in stock for immediate delivery-
CanvasGAEKKO
The adhesive picture hanger for canvas,
stretcher frames and wooden frames
stretcher frames and wooden frames
4.8/5
-in stock for immediate delivery-
PhotoGAEKKO
The adhesive picture hanger for
photos & postcards
photos & postcards
4.7/5
-in stock for immediate delivery-
PosterGAEKKO
The adhesive picture hanger for
posters & art prints
posters & art prints
4.5/5
-in stock for immediate delivery-